
Flying Training
Lesson 28: Advanced Turning and Sideslipping
Saturday 17 June 2006, 2.30pm with Kerry Scott in Citabria VH-RRW
Weather forecast: clear and sunny. Visibility somewhat reduced due to haze.
Advanced Turning and Sideslipping packs a lot into one lesson, including steep turns, spiral dives, stalls and sideslips, but the student also needs to demonstrate the following knowledge before they can be let loose alone in the training area:

- Describe accurately, by use of a diagram, the circuit arrival and departure procedures
- State accurately the radio procedures required on departure and arrival
- State accurately, by use of a chart, the training area boundaries, altitude limits and restricted areas
- State "g" loading and bank angle limits from the flight manual
I did a lot of pre-lesson reading, particularly on the manouevres, training area boundaries and the radio procedures, and committed this information to a lesson preparation page so I could read and memorise it easily. However I found that there were several discrepancies between what I read and what I learned during the lesson.
Preflight
I turned up almost an hour early for the lesson to give myself plenty of time for the preflight inspection and the anticipated question and answer session. I had the boys in tow, as Cathy was working. They set up their own cinema in an unused training room with a portable DVD player and watched Dr Dolittle and Harry Potter and for once didn't complain of being bored.
Despite these arrangements, all did not go according to plan. I forgot to memorise the HASELL checks that we need to do before practicing steep turns and stalls. I took literally the GAAP Radio Telephony Package handed out by the Camden Tower, whereas it seems that this doesn't actually reflect reality. For example, the document clearly says that when the controller gives a sequence number, the pilot should not read back the traffic to follow or the sequence number. However, it turns out this is essential. Finally, apparently I took too long over the preflight again, and in particular I hadn't dipped the tanks by the time Kerry was ready to go.
Departure and Arrival Procedures
For the record, here's the full departure and arrival procedures as I remember explaining them. The scenario is a departure to the west, and a return via Bringelly (pronounced "Brin-jelly"). The runway in use is 24.
- At the holding point, call the tower: "Camden Tower, Citabria RRW ready runway 24 for upwind departure to the training area."
- Tower responds, "RRW, cleared for take-off."
- Read back, "Cleared for take-off, RRW."
- Enter the runway, line up and take off without delay.
- Climb to 1300 feet and remain at that height until clear of the Camden control zone.
- Make a right turn to clear the inbound track from The Oaks, and climb to the appropriate altitude. Remember to clear the nose (Kerry prefers lowering the nose rather than turning) every 500 feet.
- Switch to Sydney Radar's frequency (124.55). Procedure on RRW: Use the 'CRSR' button to highlight the standby frequency (which will be Camden ATIS - 125.1). Change the frequency using the <=> button.
- To return to the airfield, switch back to Camden Tower (120.1) as you navigate to the selected inbound point (here, the brickworks at Bringelly).
- Tune the standby frequency back to Camden ATIS (125.1), and switch to that frequency to get the runway in use, QNH, wind and ATIS code.
- Switch back to Camden Tower and at the inbound point, make an inbound call: "Camden Tower, Citabria RRW, Bringelly, 1800, inbound, received Echo."
- Tower responds, "RRW, join upwind runway 24, report at Oran Park."
- Read back, "Upwind 24, RRW."
- Hold 1800 feet on the way into Oran Park, listen for radio calls and look out for other traffic in or around the circuit.
- At Oran Park, and lined up on 24, call "Overhead Oran Park, RRW."
- Tower responds "RRW, join upwind 24, maintain 1800."
- Read back "Upwind 24, 1800, RRW."
- When there's a slot in the circuit, the tower will give you a sequence instruction, eg "RRW, turn crosswind, number three, follow the Cessna on downwind."
- Read back, "Turning crosswind, number three, following the Cessna." [Note: this is where reality parts company with the ATC document, as far as I can see.]
- Carry out the remainder of the circuit as normal, maintaining separation from the preceding traffic, and listening for the landing clearance, which will probably be when you're on final: "RRW, clear to land."
- Read back "Cleared to land, RRW." and make your landing. Concentrate on flying the aircraft right down to the ground.
- Taxi clear of the runway at the earliest opportunity (remember the grass taxiways!).
- Taxi to parking, turn down the volume on the radio, and continue to look out for other traffic until parked and shut down.
Training Area Boundaries
.&date=&sizes=lmst)
Next came the description of the training area boundaries. I pointed out the boundaries as marked on the chart, but Kerry pointed out that we actually fly in a smaller area, ie not north of the pipeline, west of Mulgoa road (tiger country, bad for forced landings), or south beyond The Oaks. On the other hand, it is possible to fly east (out of area D556B and into D556A) and take a look at the M7, as long as you stay below the 2500 foot step. Note that the Bringelly inbound reporting point is in this area (though just outside the 2500 foot step). I bought a new chart (current from 8 June) and Kerry showed me how to fold it (ignoring the fold lines) for maximum convenience. We used it during the flight to identify towns and other landmarks.
Manouevering Limits
I wasn't asked the G limits of the aircraft (+5/-2), and I didn't find any limits on angle of bank (as befits an aerobatic aircraft). On the other hand, there is a speed limit of 70 knots for sideslips, which I didn't know. Time to reread the POH.
Take off
After the preflight inspection we taxiied to the run-up area for runway 24. Kerry mentioned that it was good airmanship to use the last bay, not the second-last, though that one is opposite the taxiway. The value of the checks was shown by the fact that the primer was unlocked (suspicious, as I wouldn't have expected it to be used that late in the day).
At the runway hold point we waited for an aircraft on final, and a gap in the radio traffic, before making our call. After giving us clearance, the tower followed up with, "RRW, make it a rolling takeoff,", and I responded, "Rolling takeoff, RRW". Obviously the gap in the circuit was a small one. Unfortunately this upset my normal practice of lining up and putting my heels on the floor, and I ended up taking off with my toes resting on the brakes. Ouch. Once I recognised the signs (burnt rubber/vibration) we made a normal takeoff. Sorry guys. (Note that Kerry often applies brakes briefly after takeoff to stop the wheels turning).
%20and%20transponder&date=&sizes=mst)
I was a little rattled by this but remembered the departure procedure - climb out to 1300 feet, turn north of The Oaks and climb to 4500 feet. I tuned the standby frequency to Sydney Radar (124.55MHz) and switched to it. At Kerry's prompting I also switched on the transponder, checked it was set to code 1200 and 'ALT' (Mode C), which means our altitude shows up on Sydney Radar's screen. (As well as helping air traffic controllers to anticipate and prevent potential conflicts, transponders are detected by aircraft fitted with Traffic alert and Collision Avoidance Systems (TCAS), allowing them to "see" other aircraft and take evasive action if necessary.)
Steep Turns

As we passed Mount Hunter to our left Kerry passed me the chart so I could orientate myself. The Oaks is a very visible landmark, and further up the hill is Oakdale, which services the coal mines at the top of the hill. The location we picked out for the turns was well north of The Oaks, and just west of Mulgoa Road. We carried out the HASELL checks, including a 360° turn to clear the area (noting an aircraft very low to the east, probably doing practice forced landings), and then it was round and round in circles at 45° and 60°, with climbing and descending turns thrown in. As in my first turning lesson the procedure was to identify a landmark (not a cloud!), bank the aircraft with coordinated rudder to counteract the adverse yaw and keep the nose at the same point with respect to the horizon with elevator. Keep the speed up with throttle as the stall speed rises in a turn (to 1.4 times the normal stall speed in a 60° turn, during which you're pulling 2G).
Kerry insisted that I keep a good lookout during the turns, especially towards the outside of the turn, rather than fixating on the nose. It's quite a challenge to keep the turn co-ordinated, and the descending turn was probably the hardest, as the descent rate tended to increase beyond the standard 500 ft/minute towards something more like 1500. More rudder, less aileron and plenty of practice will fix this. Strangely, the turns seemed to be harder this time than back in November, but perhaps it's just that the bar was being raised now I have a few more hours under my belt.
Spiral Dive
Once I was suitably drained, Kerry threw the aircraft into a spiral dive to the left and asked me to get out of it. This went well, I think. I rolled out without delay and gradually raised the nose. It took just seconds to recover, but I had time to notice that the descent rate during the dive was close to 2500 ft/minute. The only thing was that the book (EMT) specifies Power-Push-Roll, but Kerry said reducing the power wasn't necessary. I guess it depends on the speed of the dive.
Stall Recovery
Stall recovery also went well. Recovery from incipient stall is done on the stall warning (in RRW), and in the full stall Kerry said I lost 20 feet, "which is OK if you have 20 feet to lose." I think she was quite happy with it - during the previous stalling lessons I'd put the stick too far forward which meant we lost a lot of height. I've done a lot of reading (and some flight sim practice) since then and this time I decisively moved the stick forward just enough to unstall the wings, and promptly throttled up and put the nose on the horizon. The only thing I omitted to do was to then set carby heat back to cold.
Sideslips
Next up were sideslips in straight flight and in a turn. The latter felt very strange. I guess you would do it if you had to lose height and land in a particularly tight spot. Note that the POH has sideslip limits - 70 kts.
One unplanned exercise was avoiding an aircraft that was on a converging course. This was a classic example of the converging aircraft appearing to remain stationary in your field of view. One minute it was a mile or two away and above us, then the next minute it was up close and personal. Kerry chose to dive away from it, but I could tell she was disappointed that I didn't react faster
Inbound
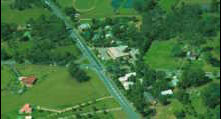
It was time to return. The first action was to locate the inbound point, which in this case was Bringelly. The brickworks (not visible in this photo as they're off to the left) are extensive, long, low and dark, and easy to spot even from a distance. Looking south from Bringelly you can see Oran Park and Camden.
Now for more radio tuning fun. Switch to Camden Tower frequency, press 'CRSR' twice to select the standby frequency and tune it back to the ATIS (125.10). The ATIS code was Echo (same as on take-off). Made the inbound call and was told to report at Oran Park (see the procedures above).
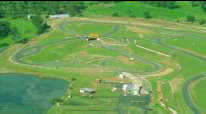
At Oran Park (where a race was in progress) I reported, "RRW, Oran Park, 2000 feet." and was told to join upwind, and to remain at 1800 feet. I responded. "RRW" and was told in no uncertain terms to readback the joining instructions. That's sorted then.
The circuit was busy and we had several aircraft close to landing. Remaining at 1800 feet we flew over the top of one aircraft on finals until we were over the threshold and tower then said, "RRW, turn crosswind now. Number 3, follow the Cessna on downwind" (or words to that effect). The response was (or should have been), "Turning crosswind, number 3 behind the Cessna, RRW". The ATC document says you should then look for traffic and call if it's not sighted. No need to make a "traffic sighted" call.
As we followed the two preceding aircraft in, I lost sight of the second one under my nose. This is obviously dangerous - the pilot needs to keep sight of the aircraft ahead in the sequence and maintain separation.
Landing
My approach was fine but I flared too soon, so was set up for a stall rather high above the runway. The actual touchdown was a nice three-pointer, but Kerry says I wouldn't necessarily have got away with it in an aircraft other than a Citabria. On the other hand, she also said that landing at the end of a long lesson when feeling somewhat queasy was different from landing in the course of a session of circuits.
Taxiing
At Kerry's prompting I used the grass taxiway, and before turning right towards the parking area I waited for an aircraft approaching along that taxiway from my left. However, I stopped on the 'outbound taxiway. Lesson: when waiting for aircraft to cross, wait in between taxiways, not on them.
Summary of lessons learned
- Memorise all checklists and procedures, and use as appropriate. For example, when climbing, lookout, check mixture fully rich, carby heat to cold, switches on, then run through Power, Attitude, Speed, Trim (PAST) during the climb. Remember to clear the nose every 500 feet, and when levelling off, use Attitude, Power, Speed, Trim (APST). I've highlighted these checklists in the Aviation Glossary.
- Readback all instructions from ATC.
- Heels back on takeoff!
- Outside the Camden CTA, switch to Sydney Radar (124.55) and turn on the transponder (squawk 1200).
- Remember to stay within the modified training area boundaries.
- Keep a good lookout at all times.
- React quickly and decisively if another aircraft is on a converging course.
- More rudder and less aileron in steep turns.
- Set carby heat back to cold after reducing power for stalls.
- Watch the flare.
- Don't block taxiways when waiting for other aircraft.
Photos
No in-flight photos as this was a pretty intense lesson, but the low sun afterwards really brought out the red and yellow colour of the PZL Dromader (VH-TGI) that was waiting to do training with the Rural Fire Service the next day.
Click thumbnails to enlarge.
 Dromader and C150 |
%20behind.&date=Saturday%2017%20June%202006&sizes=lmst) RRW and Dromader |
 PZL Dromader |
 PZL Dromader |
.%20A%20seat%20for%20a%20second%20crew%20member%20faces%20aft%20behind%20the%20pilot's%20seat.%20Under%20the%20first%20aid%20kit%20sign%20is%20the%20fitting%20for%20adding%20foam%20to%20the%20water%2C%20and%20below%20that%20is%20where%20it%20takes%20on%20water.%20The%20red%20stains%20are%20from%20the%20fire%20retardant.&date=Saturday%2017%20June%202006&sizes=lmst) Dromader cockpit |
.&date=Saturday%2017%20June%202006&sizes=lmst) Dromader |
%20lines%20up%20on%20runway%2028.&date=Saturday%2017%20June%202006&sizes=lmst) Tiger Moth |
%20starts%20its%20take-off%20run%20on%20runway%2028.&date=Saturday%2017%20June%202006&sizes=lmst) Tiger Moth |
 King Air |
 King Air |
 Dromader |
 RRW and Dromader |
 RRW |
.&date=Saturday%2017%20June%202006&sizes=lmst) Dromader |
Next lesson
These are the lessons that need to be taken before the GFPT. Kerry says I can choose to these lessons in any order I like:
 Practice forced landings. This was the last lesson, and the first following my solo circuits.
- Crosswind circuits 1 & 2 . We need a decent crosswind for these lessons.
- Turning 2. That was today's lesson.
- Area solo check. Departure and arrival procedures and training area knowledge.
- Area solo 1.
 Spin recovery (optional). Almost complete but I became indisposed before I finished it.
- Area solo 2.
 Crosswinds 3. My last three flights before GFPT were all in crosswinds.
- Short field take off and landing (I like the sound of this).
- Solo circuit consolidation.
- Precautionary search and landing.
- Instrument flying 1 , 2 , & 3 (originally only two, but we need 2 hours' I/F time).
Theory: ![]() Pre-Area Solo Exam. This is distinct from the BAK exam.
Pre-Area Solo Exam. This is distinct from the BAK exam.